
You may not have noticed but we’re in the middle of a computer renaissance at the moment. It’s not Windows or Mac leading the charge though; rather it’s a bunch of chaps up in Cambridgeshire with their Raspberry Pi. If you’ve lived under a rock for the past 18 months, the Raspberry Pi is a credit card sized computer that costs around £30. It can run a variety of different Linux operating systems, some of which have been designed specifically to get kids into computing.
It’s entirely possible to go completely DIY with a Raspberry Pi, a PC with an internet connection, a SD card and a lot of swearing, but I’d argue it’s not for the faint hearted. I had an original Pi when the first came out and it did require some command line expertise, as well as a low level format of my SD card. It was interesting to have a play around with but at that point I wasn’t willing to sit down and struggle through the discovery process with a child in tow.
That’s where kits like Kano come in. Kano uses the Raspberry Pi model B, bundles it with a case, a funky Bluetooth keyboard and trackpad, an operating system aimed at kids, and some great instructionals.
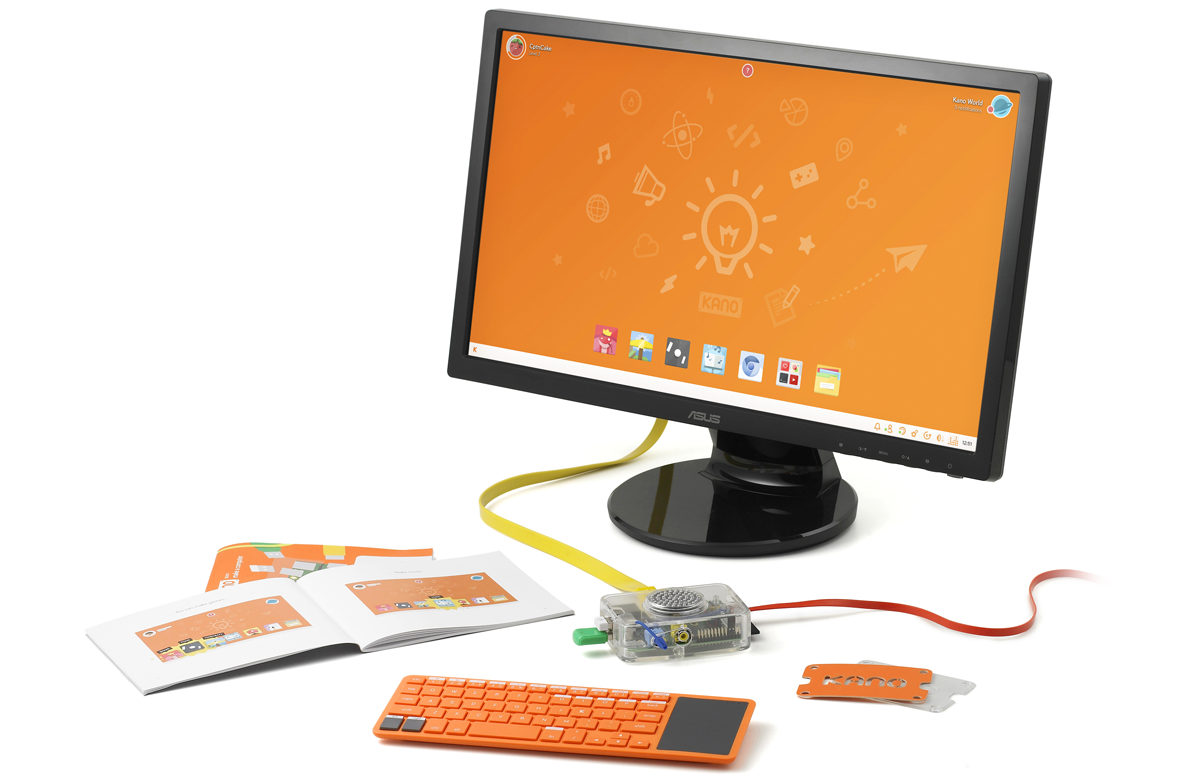
The Kano is something that works with kids from the moment the cardboard box is cracked open because they get to build the device- put the Raspberry Pi board in the case, connect the speaker lid cables to the board, plug the speaker in to the audio out jack and hook it up to the telly. The kit contains a case with an interchangeable case top- one with a speaker and one without. The speaker is useful if you have hooked your Kano up to a monitor that doesn’t have any built in speakers. You also get loads of stickers and bits and bobs so you can customise your Kano to your own style. As far as injection moulded cases go, the one the Pi is in is beyond anything I could knock up!
Instruction manual one deals with assembling the kit, plugging it in and connecting it up to the monitor/TV and BT keyboard. It’s a mixture of bright and simple imagery with simple sentences that a child can easily follow. Within ten minutes of cracking open the box the boy (8) was successfully pinging Google, which is a great command to be told to do once you’ve hooked it up to the wifi. I love pinging stuff personally. Kano is basically a skin on top of Linux (Debian, if you’re into your Linux distros), that makes the user interface much more appealing to kids and a lot easier to navigate around. Most of the apps that are provided by Kano are educational but it does have the Linux version of Google’s Chrome web browser (called Chromium), Minecraft, XBMC and a lot of other goodies if you have a dig around in the installed programmes. All the Kano specific software runs with lots of bright cheerful on screen instructions that in some instances back uo stuff in the manuals but more often than not lead you hand in hand through what you need to do in a way that’s helpful and not patronising in the slightest.
The second manual, the grey one, contains lots of useful tutorials to get you started in coding. Within no time at all we had a terminal open and were using the echo command in conjunction with the built in voice synthesizer (appending the code ” | espeak” to the string echo words are easy to say for example). Suffice to say the espeak synth can manage successfully to say poo, bottom, wee wee and a variety of other words.
The boy moved on from terminal action to making (or to be more precise, altering) Pong with Kano bricks. This reminded me a bit of Scratch or Kodu, in terms of use. Scratch is also included on the install, so if you’re familiar with that you can get stuck in to that instead. Fifi and the boy found it really straight forward to change various parameters in the game without even properly realising that they were doing it. We had an experience with a bit of a bug where the colour palette stayed on the screen and wouldn’t go away but we worked round it satisfactorily.
The kids played on the Kano for over 3 hours on the first day and have returned to it every day since in some manner or form. As far as it goes, I’ve not used anything Pi based as straightforward. One of the things I like about Kano is that the operating system and the books are free to down load. This means if you’ve bought a Kano kit and the kids love it but start bickering incessantly over who’s turn it is, you don’t necessarily have to buy another full kit, you could go the DIY route I mentioned earlier, knowing that what you get at the end is going to be very usable. The Kano website has an instruction set for setting up an SD card to use, and it does involve downloading two different programmes- one to format the SD card properly, the other to copy the Kano OS image over to the disk. As I said, it can be a bit fiddly.
In terms of cost the Kano DIY Computer Kit retails for £119 including postage. The Bluetooth keyboard is custom made and pretty good to use. There is plenty of travel on the keys, it has a built in charge cable and a handy slot to store the BT adaptor in. The pack includes everything you need to get up and at it, including a HDMI cable, which is more than most device manufacturers put in the box. The Kano is absolutely ideal for younger kids. When you hit secondary school age, it becomes a bit harder to chose between the Kano and something like the Fuze, which is a lot more expensive but does allow for breadboard type circuit making, as well as programming in their own BASIC language.
All in all though, the Kano is now a valuable asset in our household. It’s stopped the boy spending eight hours a day watching Stampy videos on YouTube, which in itself is a minor miracle. What has been nice is seeing the boy and Fifi work together on problem solving in the commands or programmes they’re working on. Such a display of unity is somewhat uncommon now days, so it’s great to see them so enthused.